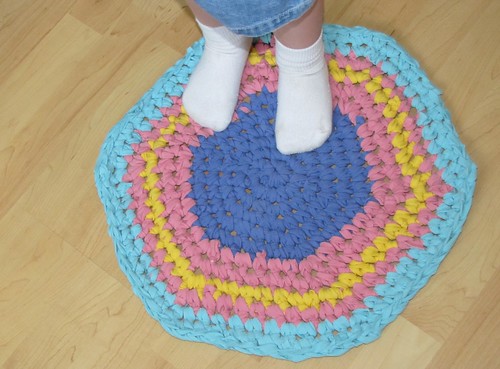
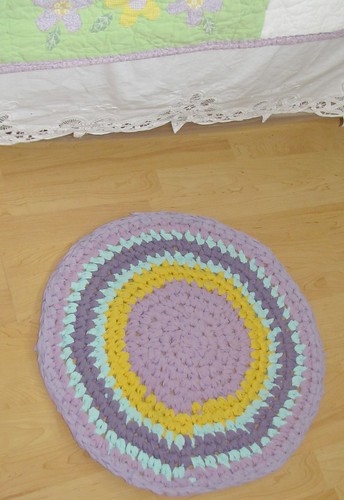
When Irish Jig transitioned from the sweet family cradle in our room to her shared room with Jazz, I started dreaming of ways to decorate their room. Two years have gone by, sadly, and I just recently painted their walls. I have mentioned my battle with procrastination before and it's still alive and kicking. While their room is not quite finished, I want to share the sweet little bedside rugs I've made. These are simple little circles to provide a cozy spot for those sweet feet in the mornings.
I've been slowly working my way through the fabulous Little Crochet book by Linda Permann, making sweet gifts for my own baby and for friends. She has a great pattern for a felted play rug. It was just the type of rug I wanted, but I really wanted to use recycled or upcycled materials. Then I remembered the stack of outgrown tee shirts waiting for either thrifting or project use. Cutting the strips was easy enough with my rotary blade and mat, but connecting all those strips seemed monumental. Until I figured out this method. I don't claim it as an "original" idea as it's the conglomeration of several web searches. It works for me, though, and hopefully for you.
Step 1: With the tee smoothed flat onto your cutting mat, slice one side from bottom hem to sleeve, cutting off the side seam. Then proceed to cut strips, starting at the bottom and working your way up toward the neck. I use a strip width about 3/4" to 1". Once you hit the sleeves, be creative and get as many shorter strips as you can. (No picture of this step because you can handle it on your own, I promise)
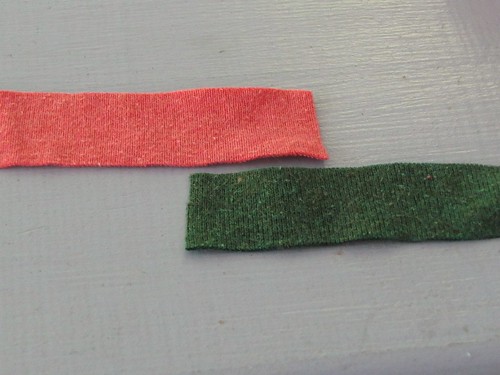
Step 2: Take two strips (I am using two different colors in my example) and lay the ends next to each other, but in opposite directions.
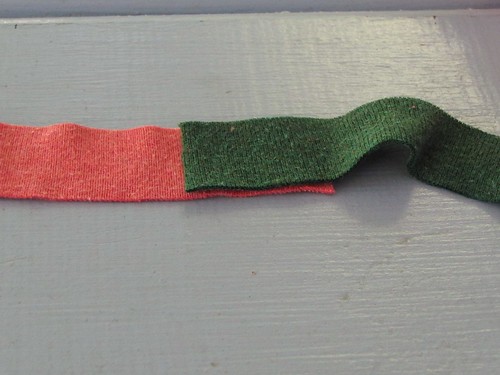
Step 3: Lay one end atop the other, overlapping about 1".
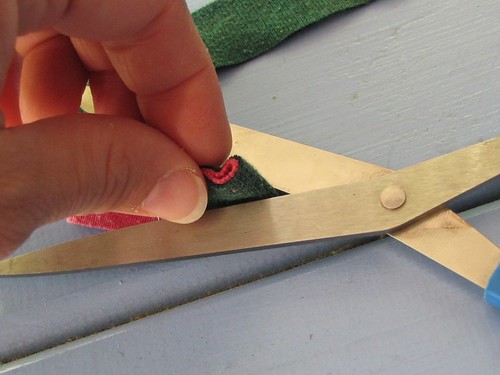
Step 4: Fold this little overlapped section in half and make a small clip with the scissors. This will make a slit in each layer of the overlapped ends.
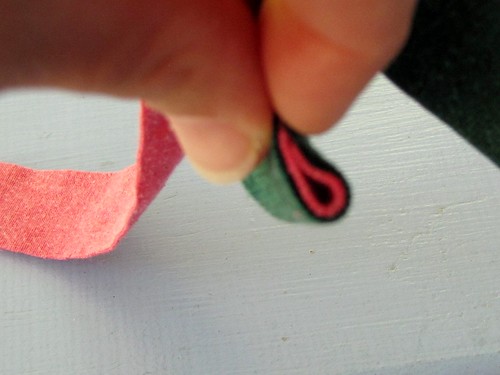 |
| Fold overlapped section in half |
 |
| Make a small slit at fold |
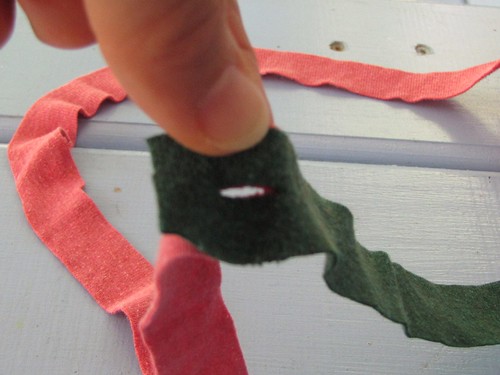 |
| Overlapped section with small slits |
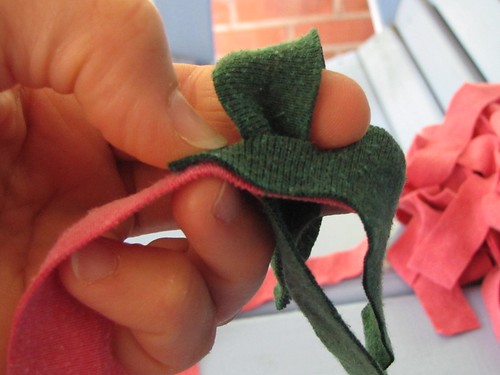
Step 5: Thread the free end of the top strip up through the little slits you just made. Make sure to thread the free end through the hole from the direction opposite it's layer - in the following picture, the green is on top, so the free green end is threaded from the bottom. Are you with me?
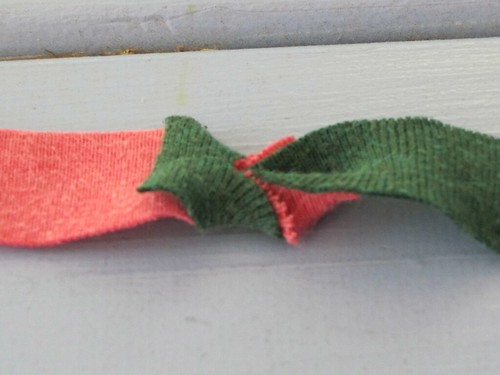
Step 6: Pull through until the ends make a little bow tie pasta shape.
How's that for easy and fast? I connected several shirts worth of strips while watching Harry Potter with the boys. I like that the little rugs have colors that coordinate with the girls' room and with each other, but aren't matchy matchy.
I have leftover strips, too, so there's a sweet feet rug in my own future!

No comments:
Post a Comment
I thank you for visiting with me and for sharing your thoughts. I hope your day is fabulous and that you make some time for music - no matter what kind!