Showing posts with label baking. Show all posts

Thursday, November 7, 2013

I'll do this my way now

I've always enjoyed creating birthday cakes for my children.  In the early years, I used the Wilton shaped pans for the perfect dinosaur/ teddy bear/ clown.  Then Zydeco announced his desire for a Poison Dart Frog cake.  That one gave me many reasons to pause....

There's no pan for that, just in case you wondered.  Enter my new favorite plan for cake creating - bake rounds or rectangles and grab the large serrated bread knife.  Add a hefty dash of engineering brain and you can create just about anything.  Including a poison dart frog, a baby chick hatching from her egg, an ice cream cone, and a beaker of gooey scientific looking liquid.

When Irish Jig put in her request for a costume party and we decided to piggy back on Halloween's festivities, using a Halloween themed cake seemed like a great idea.  Fun and a little spooky, but not scary for our under 5 set.  A spider?  Yes!  I found an inspiration picture which suggested using scrapbook paper for the legs and round cake layers.  Awesome!

A few days prior to the party, Irish Jig pulled a typical almost 4 year old move and announced that she needed a PRINCESS CAKE!!!  There was much demanding actually.  And maybe even a little sitting on the bottom step for using a nasty tone.  I'm just sayin'

Given my decided lack of Princess Love - I'm an engineer after all, not a princess - I needed a way to make my easy cake idea work with her sparkly needs.

So, I consulted the Queen of All Things Cake.  Check out that rainbow layered cake toward the bottom of her post.  Jannette's consulted on many a cake over the years, from how to shape a dart frog to how to make the perfect black icing (that's harder than you'd think).  Her solution to the Princess cake was inspired - and easy  - thank goodness!

Make a crown shaped cookie and ice it with sparkles.  A PRINCESS SPIDER!!!!


A crowned spider, complete with sparkly purple pearls!


A bit of engineering was still required to lever the large cookie.
It's good to know my stay-at-home brain still gets the occasional work out.

Today's post title from 3 Doors Down My Way

Tuesday, October 22, 2013

Yummy yummy yummy, I got love in my tummy

In my last post, I mentioned the fabulous chocolate chip cookies we'd baked and promised I'd share the recipe. Chocolate chip is definitely my favorite cookie flavor and is my first choice for baking. That said, I really don't like baking cookies! Much like my intense dislike of muffin pans, I can't stand waiting around on individual trays of cookies to bake. Then waiting for them to cool. Repeat cycle as necessary....and, sadly folks, that's with me having a double wall oven! Most cookie recipes have to be doubled and then require two hours or so for all those pans to bake their 10 - 15 minutes.

Yes, my attention span is really that short.

Where was I? Oh yeah, sharing a recipe.

This is the THICK AND CHEWY CHOCOLATE CHIP COOKIE recipe from America's Test Kitchen. A few years ago, my father-in-law gifted us with The Complete America's Test Kitchen TV Show Cookbook, years 2001-2010. It's become our favorite go-to reference for how to cook almost everything because it explains the science of particular cooking processes. I am pretty sure my FIL intended to assist my cooking endeavors since Mr. Neoclassic has been our main chef. I'm not offended in the least but really didn't admit that I only use the cookbook for baking recipes :)

For the record, Jazz baked the first two recipes of these cookies for us.  From start to finish - and she did a great job.  Until she wandered off when the last pan was still baking.  Wonder where she gets that weird trait?

I love the bit of chocolate covering the tooth!
My food photos are never very good, so I snapped
Irish Jig scarfing down the last cookie of the batch.

ATK tells us that these delectable beauties profit from melting and cooling the butter prior to blending with the sugars.  Additional fat from an egg yolk ensures tenderness and prevents the cookie from hardening over time.  (You know, in the three minutes prior to it being devoured).

2 cups + 2 TBSP flour (we use King Arthur unbleached all-purpose)
1/2 tsp baking soda
1/2 tsp salt
12 TBSP unsalted butter (a stick and a half!), melted and cooled
1 cup packed light or dark brown sugar (we use light because it's what's in the house)
1/2 cup granulated sugar 
1 large egg
1 large egg yolk
1 tsp vanilla extract
1 1/2 cup chocolate chips (we use the Costco/ Kirkland chips, which have responsibly sourced cacoa)

Preheat oven(s) to 325F and place racks in upper and lower thirds.  Line baking sheets with parchment or silicone mats.

1. Whisk flour, soda, and salt.  Set aside.
2. In a standing mixer with the paddle attachment, beat sugars and melted butter at medium speed until smooth.  Add the egg and egg yolk, along with the vanilla, and beat on medium-low.  Add the dry ingredients a little at a time, scraping the sides of the bowl if necessary.  Mix in chocolate chips until just incorporated.
3. Divide the dough into 18 portions (for large bakery sized cookies) or 36 (for regular dinky-you're-so-stingy sized cookies).  Roll each portion, then break the ball into two, rotate those pieces 180 degrees and stick them back together.  This puts the rough, pulled apart edges outward and gives more of a rustic bakery look.  They will spread, so give them room on the pans.
4. Bake until the cookies are light golden brown and edges begin to harden.  Usually about 15 - 18 minutes, and rotate the pans halfway through.  (Truth moment:  I rotated the first time we baked these and haven't ever since.  They still come out wonderfully).

After typing "12 TBSP butter," I more fully understand the now-apparent tightness of my jeans.


Today's blog post title originally recorded by Ohio Express.

Friday, October 18, 2013

Oh Princess, you make the party

Irish Jig celebrates her birthday toward the end of October. She's been telling me for months that she wants her friends to come play at a costume party. That seemed easy enough to accomplish since they'll all be dressed in costumes on Halloween evening. We decided to invite her two little friends (she has more, but we keep parties for small people very small). After hitting the streets on Halloween evening, they'll stop by for a few games and some cake.

While browsing through the Spooktacular September archives over at eighteen25, I saw an awesome idea for sharing homemade treats with friends. The girls and I spent an afternoon baking chocolate chip cookies (the best ever recipe - will share soon) and prepping treat boxes.


The sweet label is from simplykierste.com (via the eighteen25 site).  We used electrical tape to adhere the labels to the boxes.  For the two families invited to Irish Jig's party, I included a small invitation inside the container.  The other boxes were prepped to share with good friends in the area.  The girls and I parked down the street or around the corner from a friend's home and then I let them run up to the house, place the container, knock or ring the doorbell, and RUN back to me.  It was hilarious to watch because adorable Jig doesn't run fast, so there was really no secret.  There was great fun, though and a wonderful memory made.

As for a certain little girl's costume this year...she'd requested a princess dress.  At first, she wanted to wear on of her hand-me-down dresses, which are all Disney characters.  I really didn't want her to go as Cinderella, etc. and spent a few weeks gently persuading/ planting my desires in her little brain.  Oh, please, all mama's do this when necessary.  Finally, she asked for a purple princess dress.  See it over there in the What's Going On block?  It's almost done and perfect for her birthday.


Today's song title from Matt Nathanson's Princess.

Sunday, March 24, 2013

Roll away the stone


Irish Jig and I had a sweet friend hanging out with us for two days last week.  His mama needed a little child care help and, happily, I am currently in a position to fill that need.  I remember my days of working (both full and part time) and running into days when extra/ additional care was needed.  I had a friend available to help me then and I like to think I am that friend now.

That said, sweet little James was really a help to me.  With a playmate, Irish Jig was challenged and entertained by someone other than me!  I was able to sew a bit, complete some much needed ironing and tend to necessary chores.  It's what I call a win-win!

I did set aside windows of time to concentrate on the two of them and one of those windows was making Resurrection Rolls.  After reading this post on children's abilities in the kitchen, I stepped back and just directed.  Admittedly, this was really difficult for me to do as I am a control freak and a neat freak.  But they did just fine with their age appropriate tasks.  James measured and mixed the cinnamon sugar "spices" and Irish Jig cut the butter pats and placed the bowl in the microwave.  (I removed it in case it was hot).


We talked about the use of the oils and spices in the preparation of Christ's body for burial.  Then I introduced the marshmallows   I'd forgotten to buy big white ones, so I quickly improvised that the leftover Valentine pink hearts represented Christ's love for us - don't judge me.  They took turns rolling marshmallow hearts and wrapping them in "linen" crescent roll dough.


They did need a little assistance with the wrapping of the marshmallows and the pinching of the open seams.  James slid the pan into the lower oven and they stood at the window to watch.  There was much excitement as the marshmallows melted and made little puddles.  After I pulled the tray from the oven and the rolls cooled a bit, we broke one open and marveled at the empty "Tomb".

We made eight tomb rolls.  After they each sampled one, they surprised me by not asking for a second.  Instead, they decided to save the remaining rolls for James' brother and Jig's siblings.

Luckily, that left an extra for me and an extra for Mr. Neoclassic :)

Today's blog post title from Matt Maher's Resurrection Day

PS - Did you notice the new header?  It's the Shenandoah Valley ripe for a snow storm.  More on that later!

Thursday, January 31, 2013

A habit I can't break


I must admit to you that last week's King Cakes were from a new-to-me recipe. I have a horrible habit of trying any new King Cake recipe that crosses my path. (Some husbands might say this more of an addiction). When I pulled my baking recipes binder from the cabinet to prep those cakes, a stray piece of paper floated to the floor.  It was a handwritten recipe for the cake dough....from I don't know where! On a whim, I decided to try this unknown recipe because a quick glance at the ingredient list showed it wasn't too different than my current favorite.  The added bonus is that it makes 2 cakes for the same amount of work - 1 for you and 1 to share!

But now? It's our NEW favorite.  I feel compelled to share it with you.  Since I am positive that you've all been making King Cakes this whole time, right???


Dough Ingredients:

1/4 cup butter or margarine (Oh, please, who uses margarine? Just grab that butter!)
1 (16 ounce) container sour cream (this is the difference!)
1/3 cup sugar
1 teaspoon salt

2 (.25 ounce) envelopes active dry yeast OR 5 tsp yeast
1 tablespoon white sugar (you can substitute honey, as well)
1/2 cup warm water (100 to 110 degrees)

2 eggs
6 1/2 cups all-purpose flour, divided


Directions:

1. COOK first 4 ingredients in a saucepan over low heat, stirring often. Cool mixture to 100 degrees to 110 degrees. (Essentially, you're scalding these - just like the other recipe)

2. DISSOLVE yeast and 1 tablespoon sugar in 1/2 cup warm water in a large bowl; let stand 5 minutes. Add butter mixture, eggs, and 2 cups flour; beat at medium speed with an electric mixer 2 minutes or until smooth. Gradually stir in enough remaining flour to make a soft dough. (Note: My dough is always very wet and it takes an extra 3/4 cup of flour.)

3. KNEAD with your stand mixer for 8 minutes.  TURN dough onto a lightly floured surface and knead for just another minute because it feels good and pioneer-ish. Place in a well-greased bowl, turning to grease top. Cover and let rise in a warm place (85 degrees), free from drafts, 1 hour or until doubled in bulk.

4. STIR together 1 cup white sugar, 1 cup brown sugar, and 2 TBSP cinnamon; set aside.  In a separate bowl, melt 1/2 cup butter.

5. PUNCH dough down and turn out onto a lightly floured surface; roll to a 30" x 30" (approx) rectangle. Cut this in half, leaving you with two pieces.  Spread half each with melted butter and sugar/ cinnamon mixture.  Roll each dough, jellyroll fashion, starting at long side. Place dough roll, seam side down, on a lightly greased or lined baking sheet. Bring ends together to form an oval ring, moistening and pinching edges together to seal. (You could also cut the large rectangle into thirds and braid the cake, but it will be huge and very tall - almost too high to comfortably take a bite.)

6. PLACE each cake in a warm spot for 30 minutes.

7. BAKE at 375 F for 15 to 18 minutes.  Do not overbake because it makes the cake dry.

8. PROCEED with icing and colored sugars as per this post.


Humorously, we had a friend from the New Orleans area stop by last weekend and, of course, I offered her a piece.  She was so enthusiastic about it's flavor and texture, that she likened this cake to one of her favorites from "back home" and vowed to send me that recipe.  Surprise!  The recipe she sent is exactly the same as my unknown handwritten one!  Now I can tell you that this sour cream version was printed by Southern Living in January 1990.

I always give credit where credit is due.  Please comment or email if you try to make a King Cake this season.  I would love to hear about your experience and opinions.

Post title - Dolly Parton's A Habit I Can't Break.


Friday, January 25, 2013

Come on in and sit right down


I wish I could invite all of you (or "all y'all", where I'm from) to warm yourselves at our fire on this cold snowy day. Happy weekend to all!

Two this week.  One went to Mr. Neoclassic's office.

The whole house smells sooooo good right now!!


Saturday, January 12, 2013

Let's all go to the Mardi Gras - part deux

Let's finish our King Cake, shall we? Part one is here. You'll need a rolling pin, flour, and muscles.  Plop the dough onto your floured counter and give it a good kneading or two.  Let it rest for just few minutes to help it's elasticity.  This is a good time to mix the filling ingredients:

White sugar, brown sugar, pecans (optional), and cinnamon.
(Pretend the cinnamon is up there with his friends)
And butter

Blend about one cup of each sugar with 2 tsp cinnamon and chopped pecans, if using.  Melt the butter in a separate bowl and set both aside.

Go back to your dough and start to roll into a rectangle.  


1: Roll your dough into a rectangle.  
2: Aim for approximately 30" x 15".  Don't measure even though I did in order to give you a guideline.  I'm Type A, so that's my excuse.
3: Slice rectangle into thirds.  Don't be exact, it's okay to eyeball.  Brush each third with melted butter and sprinkle LIBERALLY with filling mixture.
4: Jelly roll each third, then stack onto the baking sheet.
5: Start braiding around and stop when you reach each end.  Stare at it and scratch your head for a moment until you figure out how to match the loose ends into a completed braid.
6: Stand back and congratulate your spacial reasoning abilities.

Bake at 375F for about 15 minutes.  About halfway through, tent the cake with foil to keep the top from browning too much.  I forgot to do this step.  Oops!

When the cake cools just enough to touch, gently lift one side and poke your little King Cake baby into the bottom.  Immediately forget where you've stuck the little dude and begin to hope you won't cut him in half when slicing the cake to serve.  Do you need a little baby dude?  Please email me and I will gladly share a few with you - I have several (dozen).

Let your beautiful creation cool completely for several hours.  Don't try to decorate a hot or warm cake - trust me - your sprinkling sugars will just turn to colored syrup.

Almost there!

Now it's time to mix your glaze, which will serve to adhere the sugars to the cake.  I like a glaze that nicely firms and holds it's shape, so I use the following recipe:


2 1/2 cups powdered sugar
1 T butter, softened
1 T light corn syrup
4 T water (approx.)
1/2 tsp vanilla (optional)

Mix the butter, corn syrup, vanilla (if using) and 1 T of water.  Heat about 10 seconds and then whisk smooth.  Add the powdered sugar and 2 T water, whisking to incorporate.  Add additional water until you reach a consistency that will pour but not run.  Err on the thicker side.

 Pour glaze all over the cake, covering as much of the top as possible.
Don't worry about the pools that form on the counter because you'll have small people waiting just outside the camera range with fingers ready to swipe it up.

Visually divide your cake into sixths and start sprinkling the colored sugars in order - Purple, Green, Gold, Purple, Green, Gold.  I always start with purple, but I don't know why.  I wonder if it would still work if I started with green :)  Once the glaze has firmed some, transfer your beautiful creation to a cake stand for all to admire.


Do I really need to instruct you to eat it????


Friday, January 11, 2013

Let's all go to the Mardi Gras

Oh wait!  We can't all go to New Orleans and pick up a King Cake.  We'll have to make them instead!

I promised King Cake today and I shall not fail!  My dough is rising, so let's get started with the basic recipe.  I will post the actual cake construction next (probably tomorrow).  I'll be taking pictures of the process, but have a Girl Scout event this evening and won't be able to post the final product until later.

But we'll eat it tonight, don't worry.  I could not, in good conscience, let a Friday go by without a taste of buttery, sugary goodness.

We'll start with the basic dough ingredients:

Yeast, water, scalded milk, salt, egg, sugar, flour and butter.  Mmmmm, butter.

There is some debate in the culinary world about the necessity of scalding milk in this age of pasteurization.  I will only say that I've been making King Cakes for nearly a decade and this is my favorite recipe because the dough is more pastry-like and less bread-like.  If scalding the milk helps, I will gladly spend five minutes doing so each Friday morning.  I followed the directions in this Allrecipes video.   


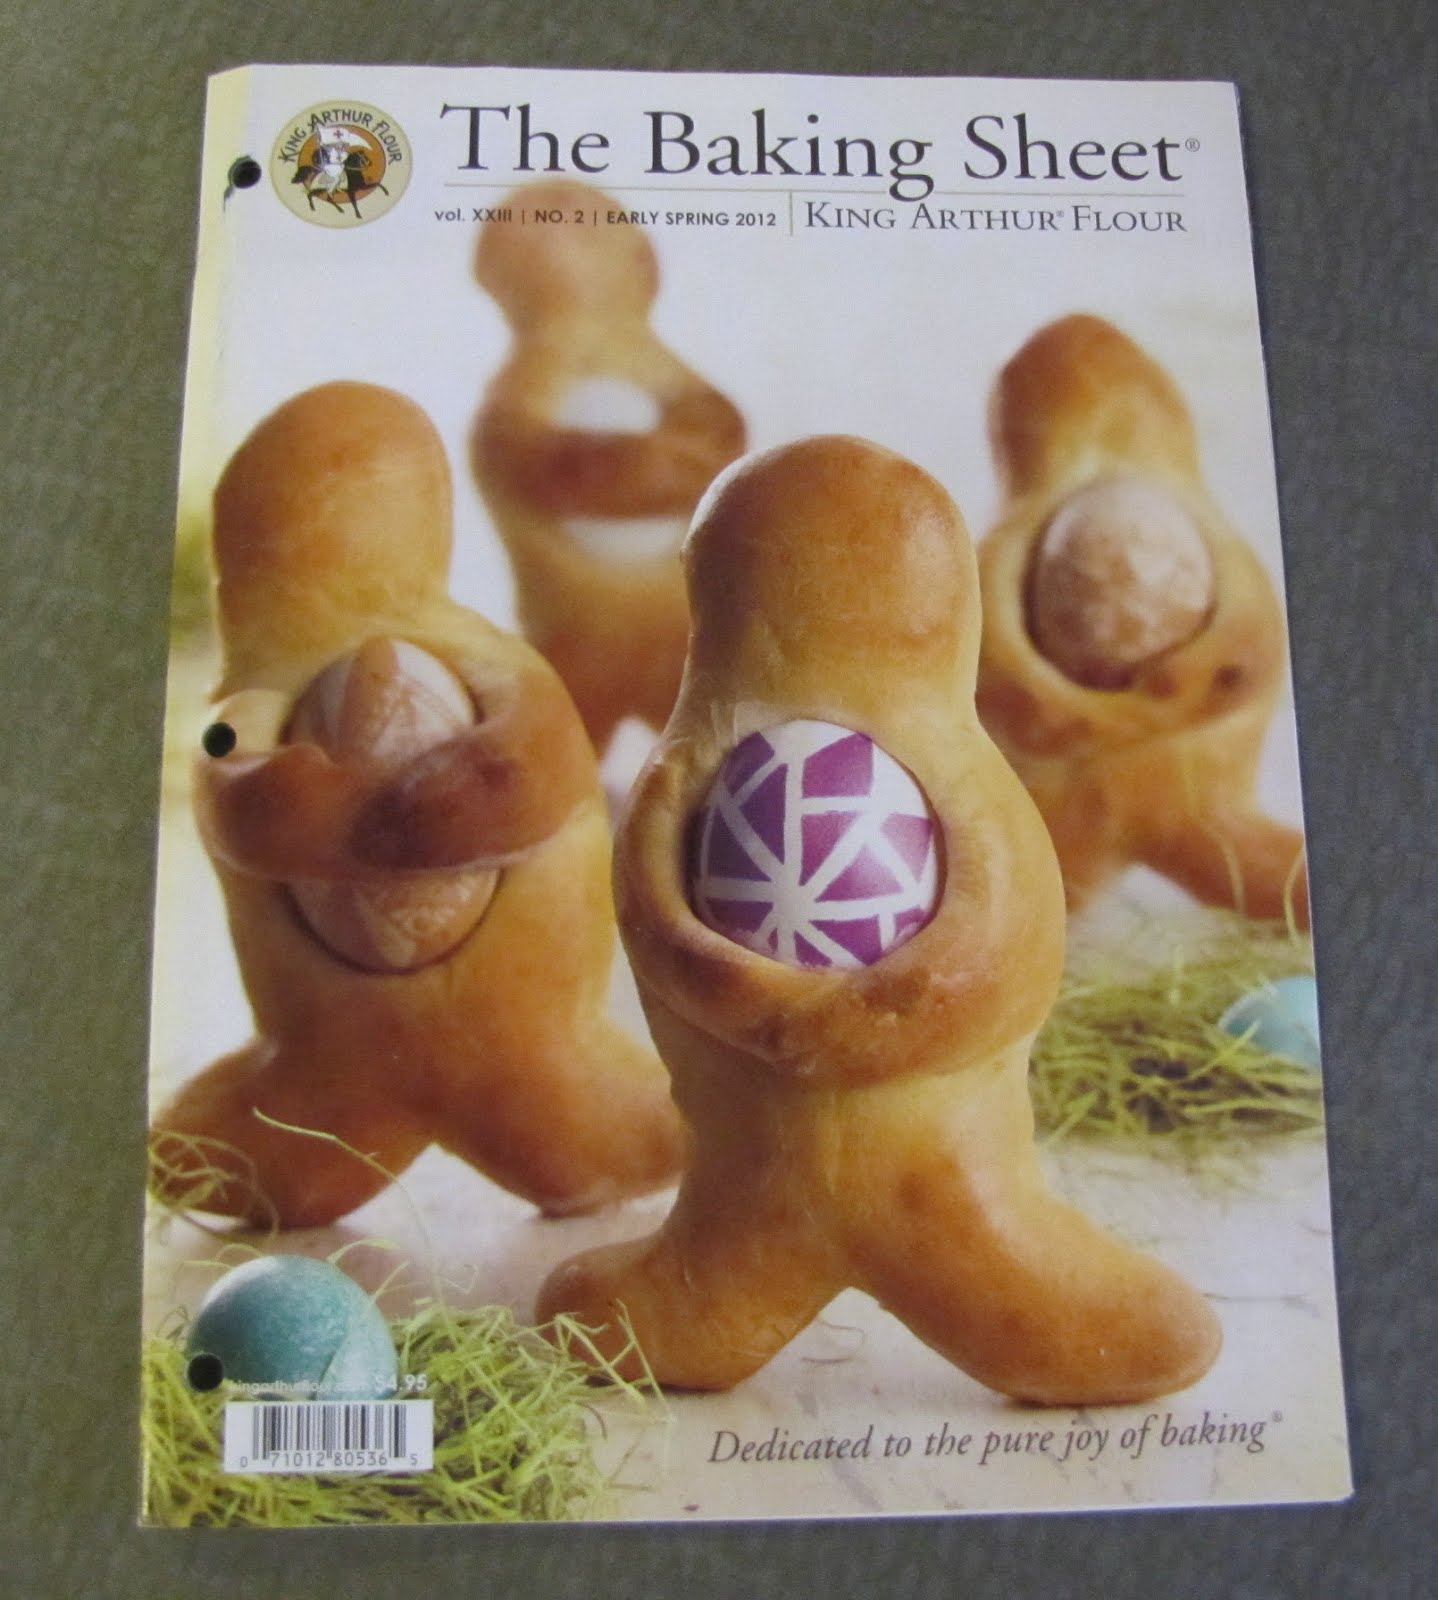
Does this magazine arrive unordered at anyone else's home?  Just wondering.

About two years ago, this quarterly magazine of King Arthur Flour recipes starting arriving in my mailbox.  I didn't order it and don't pay for it - which I actually reported to the company but they continue to send it anyway?  Well, who am I to ignore baking recipes?  I browsed this Spring 2012 issue and found the following recipe:

Karelian Cheese-Filled Buns

I can't pronounce it, but the recipe description says the dough is much like a traditional cheese danish.  That's the texture I remember experiencing with traditional bakery King Cakes back home.  I decided to give this dough a try and we really loved the outcome.  And since it's super easy - yippee for the bakers!

The 411:

King Cake (or Karelian) Dough

2 tsp instant yeast (I use Red Star)
1/4 c warm water
1 cup scaled milk, cooled to about 110F
1 tsp salt (I like Kosher)
1 large egg, room temp
1/2 sugar (be good, don't skimp)
4 to 4 1/2 cups unbleached all-purpose flour (I use King Arthur)
1/2 cup butter, soft or melted

In the bowl of your stand mixer, combine the yeast, water, milk, salt, egg, sugar, and 2 cups of flour.  Mix with the paddle attachment to combine.  (Truth?  I am too lazy to clean the paddle AND the dough hook, so I use a whisk to combine these, then just use the dough hook.)  Add the butter and two more cups of flour, one at a time.  Mix on low speed until a stiff dough forms.  Knead with the dough hook about 5 minutes, adding a little flour if necessary to clean sides of bowl.  Turn the dough onto the counter and knead by hand for about 1 minute so that you can claim "labor intensive" process.  Place your beautiful dough ball into a greased bowl, cover with plastic and let rise until doubled - about an hour.  I let mine rise on the dryer while it's running.  Apparently, it makes the laundry room humid and the dough loves that.

Deflate the dough, turn it over, return to the bowl, cover and let rise for another 30 minutes.

Sweet, pliable goodness!

Visit me tomorrow for the next installment: Rolling/ Filling/ Shaping


Saturday, November 24, 2012

Baking with passing down the wisdom


Sweeney the elf has been visiting our family for about six years - long before the whole elf movement hit the big time.  We look forward to him and his antics each year.  This year, he arrived with sprinkles, flour and an air of cookie anticipation.

With the fig cookie filling cooling in the fridge, I moved onto preparing the dough.  With some help from Jazz, we had the whole cookie operation ready to start very quickly.  Each child had a chance to roll dough, add the filling, wrap the cookies and cut them to size.  Zydeco opted to roll and cut shaped cookies because he says he doesn't like the fig filling.  But he loves to eat fresh figs.  Go figure....

Once cooled, we let the children add icing and sprinkles.  We enjoy the first tastes of the season with cocoa and laughter.  We write wish lists for ourselves and our friends/ family.  And we rejoice in another year together.

The cookie recipe used is a combination of my grandmother's original recipe and one that my mother received at an Italian cookie class she took years ago.  The resulting cookies are better than the ones from my youth.  I remember spending one Saturday each November in my mother's hometown (a little Italian town about an hour from New Orleans) baking cookies with my grandmother and her sisters.  As the youngest participating, I was always given the task of icing the cooling cookies.  A task I loved because I'd eat as many as I'd ice :)  We'd make traditional fig cookies (like the ones we made yesterday), dough cookie balls flavored with orange, anise, or cocoa, and seed cookies.  The baking would go on for hours, with much laughter (and a liberal dose of family gossip) among the woman and girls present.  Hence the choice of song lyric today.

So, for those who'd like to try these awesome cookies, I offer the following recipe:

Fig Filling -
1/2 lb dried figs with stems removed
1/4 to 1/2 lb dates
1 cup pecans, roasted 10 minutes at 350 degrees
2 T unsweetened cocoa powder
1/2 tsp cinnamon
1/2 cup orange marmalade
1/4 honey
2 T water
1/2 tsp grated lemon rind or 1/4 tsp lemon extract/ oil
2 tsp vanilla
1 tsp rum extract
dash ground cloves

Use a food grinder or food processor to grind figs, dates, and pecans.  Add cocoa and cinnamon.  In a saucepan, bring marmalade, honey and water to a boil, then pour over fig mixture.  Add lemon, vanilla, rum, and cloves.  Flatten mixture onto freezer paper or parchment and refrigerate.  (I attempted to use my processor but the motor didn't seem strong enough for the dried figs.  I switched to the grinder.)

Dough:
1-1/2 sticks butter, softened
3/4 cup white sugar
2 eggs, beaten
3 cups all purpose flour or bread flour
2 tsp baking powder
2 tsp vanilla
1/4 tsp each lemon and orange oils/ extracts
pinch of salt

Cream butter and sugar, then add eggs and extracts, mixing well.  Sift flour, baking powder and salt.  Add gradually to the butter mixture.  Final mixing may need to be by hand as the dough stiffens.  Work dough on counter until smooth.  Chill until ready.  Using a small amount of dough each time, roll into an elongated rectangle about 1/8 inch thick.  Place strip of filling down the center of dough, then fold each side over and pinch seams closed, flattening roll slightly.  Cut into 1-1/2 inch lengths and place on lined baking sheet.  Bake at 350 degrees for approximately 18 minutes or until lightly browned.  If desired, ice with traditional powdered sugar icing and add sprinkles.

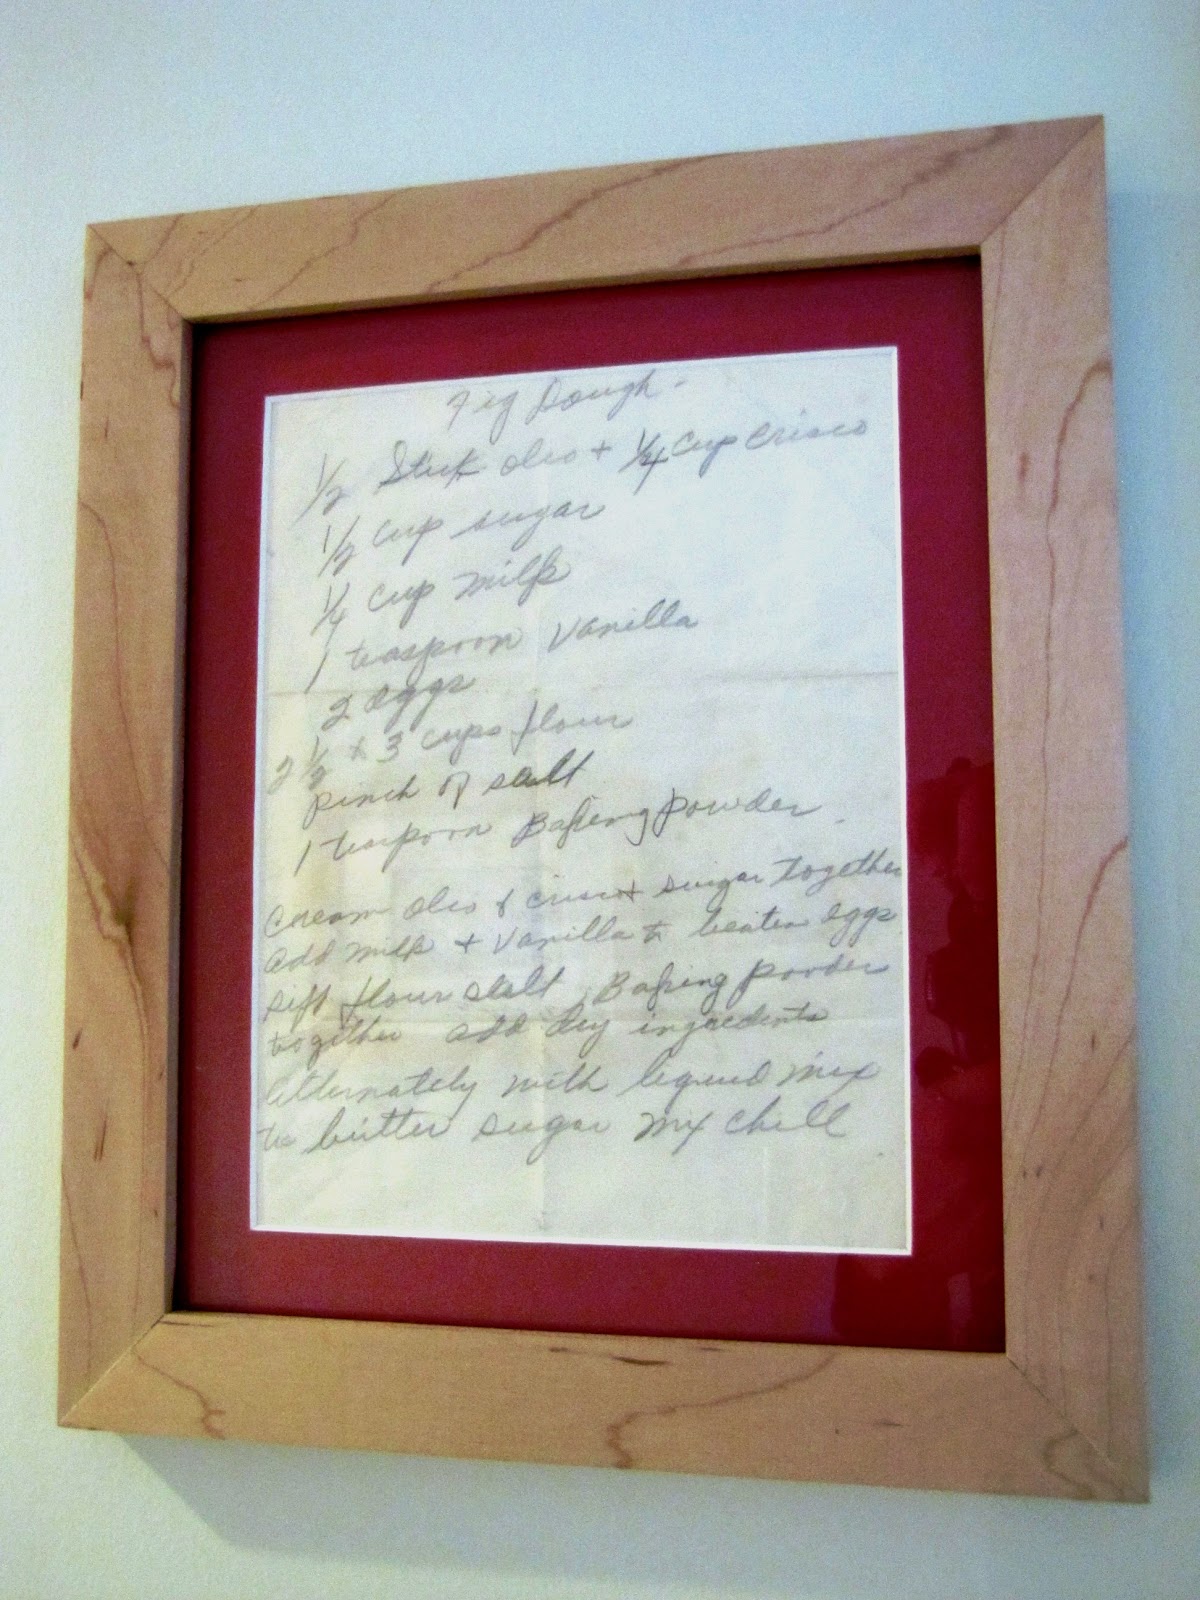
Several years ago, my mother found a copy of my grandmother's handwritten, original dough recipe. My father made the picture frame and it hangs in a place of honor in our kitchen. It makes everyday we bake seem special.


Today's post title: Cece Winans' Mamma's Kitchen


Monday, September 3, 2012

Taste and See

School starts tomorrow for our little Domestic Church. The older children are all ready and very excited. Classic Rock's starting a rigorous high school program and Zydeco's starting a fabulous magnet middle school program, while Jazz is returning to her sweet and wonderful elementary school. We, as parents, are still trying to grasp that our child is old enough for high school. Really, when did that happen? And when did he suddenly pass me in height?

Okay, so he passed me about a year ago because I'm short, but the high school part makes him seem so much taller.

This evening, Zydeco and Jazz helped me bake the coming week's lunch box goodies.

Wielding the chef's knife

Manning the mixer station

During dinner, they voted on Raw Cookie Dough Bites and Oatmeal Fruit Bars. I don't have a link for the bar recipe because it was given to me by a friend. I like that it uses whole wheat flour and flax seed meal, along with loads of fruits. The recipe is very adaptable, too. If we feel like cranberries, then I add orange extract and almonds. If we want walnuts, then I add apples and apricots. (And don't tell my children, but I leave out at least half the sugar it calls for :)

My goal is let them choose the coming week's lunch box extras. I have a growing list of healthy alternative brownies, cookies, bars, and muffins for them to sample, and it's nice to have a little homemade goodness next to your sandwich, salad, and veggies.  I think Mr. Neoclassic's happy to see the school year start because it means more homemade in his lunch box.  I get a little lazy during the summer when fixing his lunches.

Enjoy the week!

Thursday, May 17, 2012

You get what you need

We've needed to just relax and enjoy this week of family celebrations and simple time together with my visiting parents.  My mother and I were able to do a little sewing together. I watched her as she hand stitched the binding onto the Eucharist table runner in one day. I had the runner ready to go for her and she willingly sat on the couch and stitched. The children would wander through the den and sit to chat with her. She was able to help me and catch up with them - a total win win!

cross.celtic
Jazz opened a few special family gifts. She was excited to receive her Celtic cross from my parents. A traditional gift for their grandchildren.

sisters.big.day
The big day was sweet, beautiful and memorable. I think little angels were flitting around our house that morning because we managed to get everyone dressed, hair styled, wreaths pinned, and shoes found ON TIME!  In fact, we were early and as any good Catholic knows, that's a sin :)

This week, Mr. Neoclassic and I treated each of the older children to a parent-approved-skip-day. Jazz chose to show her grandparents her favorite gallery, then allow them to shop with her and treat her to lunch. The boys will be leaving with them tomorrow for a short weekend trip to Maryland. They are packed, ready and willing to go to bed on time just to wake up and travel with Nana and Papa.

11.bday
We've also celebrated the first of the May birthdays in this domestic church. We have three total this month and love to just eat butter cream icing for two straight weeks! Zydeco turned 11 and thoughtfully researched gluten free chocolate cakes. Nana has Celiac Disease and he decided a typical cake was out of the question. We used this recipe from King Arthur Flour and highly recommend it for any other Celiac's out there. Just ignore the number of eggs in the recipe. What you don't acknowledge can't hurt you, right?

Saturday, February 11, 2012

My hips don't lie


I'm enjoying a slow Saturday making dessert for dinner tonight with neighbors.

Butter used so far = 1 stick

Butter still to go = 1 stick

That's one per saddle bag. I hope your weekend plans include family and friends, as well!